Eight Little Frugal Tactics I’ve Found So Far This Summer
My wife and I both like to press our creativity and see what money-saving tactics we can come up with that save a sizable amount of money and have a lot of fun along the way. Here are eight we’ve discovered over the last several months (yep, I’ve been saving these along the way).
1. Community festivals can be a very cheap way to spend a summer weekend, particularly ones near your home or ones that line up well with other planned summer trips. Just take along a sack lunch, watch a parade and the other activities (or even participate), and even sample some of the local fare by buying one and sharing it with the rest of your group. Even better, you can participate in events that push you a bit outside your comfort zone and let you try something a bit different than usual.
For example, this past weekend, my wife and children and I attended Nordic Fest in Decorah, Iowa, which happened to fall on the same weekend as a family event. We spent most of Saturday at the festival. We tried out some of the Norwegian food (abelskivers were my favorite – balls of a pancake-like pastry covered in jam and powdered sugar, and they were only $0.25 a pop). We watched the parade (free). Our children got their faces and arms painted (free). We even spent a couple hours in the afternoon watching a rock throwing contest in which I participated. In fact, here’s a video of one of my attempts, in which I chuck a hundred pound rock roughly nineteen feet.
2. Prepare a meal before you go on a long trip. Before a recent weekend trip, we made eggplant lasagna and put it in the refrigerator. Three days later, when we returned mid-afternoon, worn out from a very active weekend, we just popped the lasagna in the oven and had a very inexpensive home-cooked meal.
Before figuring this out, we would often eat out at the end of a long trip because we were worn out after the trip. It was simply much easier to do that than to go home and prepare a meal, and that often meant $20 to $30 would be invested in the meal. By preparing the “welcome home” meal before we left, we trimmed the cost down to $3 or so.
3. Be inclusive with the neighbors as it can save you money and help forge powerful relationships. We have a swing set and a sandbox in our yard and as our son has grown older, he’s begun to interact quite a bit with other children nearby. With the recent arrival of a new family next door, with a youngest child just slightly older than our son, this has kicked up a notch.
We just made it very clear to the neighbors that their children were welcome to play in our yard and on our play equipment, no questions asked, the very day they moved in. Before long, they had invited other children in the neighborhood to play on the equipment and we welcomed all of them. Because of this, our son has had an army of children to play with all summer, we’ve become familiar with many more families on the block, and our son has been invited to play with many other children, improving his social skills. All with absolutely no cost to us (and often some savings, considering we’re playing in the yard instead of engaging in other activities).
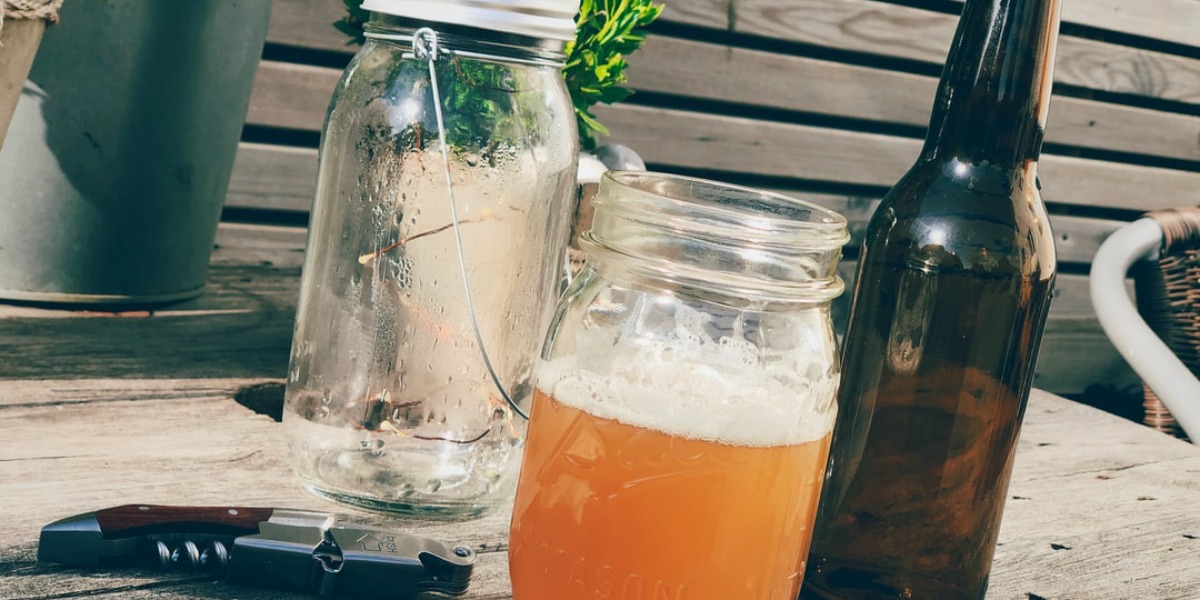
4. Making your own beer and wine is very cost-effective if you prefer craft beers and solid wines. If you’re a “two buck Chuck” person or you prefer Busch Light to everything else, making your own beer isn’t very cost-effective. However, if your tastes run more towards craft beers and solid offerings from local vineyards, then making your own can be very cost-effective (and very tasty, to boot).
For example, my wife and I recently made a batch of oatmeal stout at home. Oatmeal stouts are rather intricate brews with a lot of ingredients and you can rarely find them in stores for less than $11 per six pack of bottles. We made forty two bottles of oatmeal stout for about $45, all told. This averaged out to about $6.50 per six pack of bottles. Now, if you compare that price to most mainstream beers (Busch, Budweiser, Miller), that’s not a particularly strong savings, but if you compare it to more craft-oriented beers (Sam Adams, Goose Island, Sierra Nevada, Rogue, etc.), it can be a serious bargain – and a lot of fun. If there’s interest, I’d be glad to post a walkthrough and a cost analysis of the next batch we make.
5. I’ve started to save my shredded paper because it makes spectacular campfire kindling. Whenever I have a pile of papers to shred, I just shred them up, then get them just a little wet. Then I squeeze the shredded moist paper down into a consistent but loose ball (mostly just making sure they stick together from the moisture), then let the ball dry out in the garage.
Before a camping trip, I grab a few of these dry balls of paper and pack them away. Then, when we build a campfire, I stack up the wood, put the dry paper ball at the bottom, and light the paper ball. It goes up in flames very quickly and usually has enough heat in a football-sized ball to get some smaller pieces of wood burning. This saves money on campfire starters and lets us actually utilize the shredded papers instead of just tossing them in the trash.
6. Another “hot” tip – campfire ashes make great fertilizer. Just scoop up the ashes when you’re done and save them in a container. When you get home, dump them out around the base of any bushes you have, in your garden, or even in your compost bin. Wood ash contains plenty of potassium, calcium, and magnesium and works well as a fertilizer if applied at a rate of about five pounds per hundred square feet.
It’s worthwhile to note that you shouldn’t do this if your soil is already very alkaline. If you garden, you probably already have some idea as to the pH of your soil – if you don’t, do a pH test. If the pH is above 7 or 8, don’t add wood ashes to your soil. However, if the pH is lower, wood ashes will be a nice benefit – and you can’t argue with the cost and environmental friendliness of the source.
7. Look for “mistinted” paint at your local hardware store if you’re about to paint a room and don’t have a need for an exact shade. You’ll often find gallons for just a dollar or two and the paint is just fine – it just happened to not perfectly color match someone else’s needs. Often, you can find enough for a room of the exact same shade and, if not, you can easily get more just by asking them to make more of that shade.
This works best if you’ve decided to re-paint a room but aren’t too worried about the exact color of the room. For example, we’re discussing repainting my office in a light green. Since I’m not too concerned about the exact shade, we’ll just dig through their “mistinted” paint until I find a “light green” that I like and get it for incredibly cheap. That’s how you redecorate for pennies.
8. Perennial vegetables are an incredibly cost-effective (and effort effective) way to garden. Take, for example, our asparagus patch. We started it this spring and have some shoots up out of the ground. For the next three years, we’ll not even touch this patch – nothing at all. After that, fresh asparagus every spring, like clockwork, with no effort.
If you like fresh garden fare but hate planting and dealing with gardening and you also don’t like the cost of replenishment each year, look into planting perennials, which grow up automatically each spring. Many herbs are perennials, as are asparagus, Pacific spinach, sweet potatoes, strawberries, and countless others. Just plant them once and they come back every year with very little tending required, just harvesting. That’s cost-effective gardening.
This has been a guest post from Trent Hamm who writes about personal finance at The Simple Dollar. Please visit his blog for even more articles like this one.